Posts

Showing posts from March, 2022

Scrappy Boy Stamps - Arabian Nights

Image
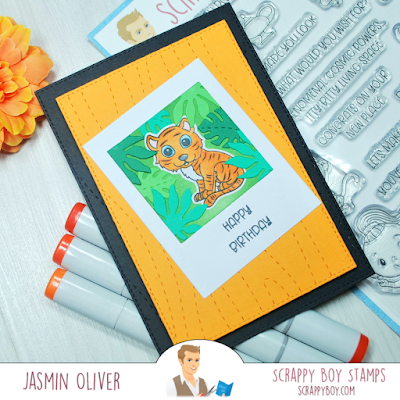
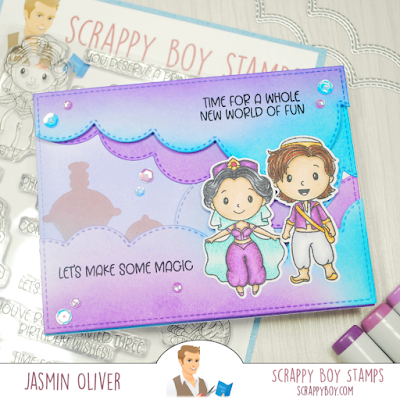
Hey Crafty Friends, I'm sharing my 2nd project using the latest  Arabian Nights stamp set from Scrappy Boy Stamps . I've steered away from creating a card today that suites to overall theme of this set to show how just one single stamp in a set can be used in different ways. It doesn't have to be this stamp set exactly, look through stamp sets you own and see if you are able to take a single stamp and use it in some way! It's a great way to maybe use a stamp set you haven't used for some time! Card Recipe: 1. Take a large  stitched rectangle  and die cut from  Oreo Crunch  card stock. 2. Take the next stitched rectangle in your die set and die cut from  Pumpkin Patch  card stock 3. With your orange card panel use a  Woodgrain  background die plate. This particular one has a running stitch so could also be used in slimline cards! 4. To create the polaroid look I have taken some dies , one is a rectangle shape and one is more square, cut the square slightly higher th

Time for a whole new world of fun

Image
Hey Crafty Friends, I am super super excited to share this card with you today. If I was to be asked what my dream stamp set would be then this would be in the top 3 for sure!! I mean the hint is my name clearly (minus the e!) 😉 This is the  Scrappy Boy Stamps  Arabian Nights release, you don't want to miss it! Card Recipe: 1. Take a panel die cut from your favourite ink blending card stock. I'm using PaintON today. I've die cut using a  stitched rectangle  one panel and then cut 2 more panels from the same card stock which will create my clouds. Try and leave an area on the left hand side so we can create the illusion later that they are high up in the clouds 2. Die cut your clouds using a  stitched cloud  die. I've lined them firstly from the bottom up and staggered them to about half way up my main panel and then repeated this from top down so they overlapped 3. Ink blend you cloud panels with  Shaded Lilac ,  Wilted Violet  and  Mermaid Lagoon  distress inks 4. In

A little Hello-ween

Image
Hey Crafty Friends, Too early for Halloween cards? It's never too early to be prepared for any occasion! These stamps from  Sweet November Stamps don't get enough love in my stash and when I saw this ink blend from a recent class at the  Card Maker Success Summit I just knew it would make a great background for these Hello-weens . Card Recipe: 1. Take a  stitched rectangle and die cut from your favourite card stock for blending. I'm using PaintON card stock today, this is my my fave ink blending card stock 2. Ink blend from top down with Wilted Violet ,  Candied Apple ,  Carved Pumpkin and  Squeezed Lemonade Tip: get your ink layers down first roughly and then repeat the ink colours over the top to create a more vibrant look. You can even repeat a 3rd time to get the vibrancy you like.  3. Spritz or splatter some water on your background and tap dry with kitchen towel to create some texture in the background  4. Stamp images on  alcohol marker friendly card stock and c

Splat, Zonk, Boom!

Image
Hey Crafty Friends, I'm sharing brought and cheerful superhero card today using the latest  Scrappy Boy Stamps release.  I've used some of the fun word sentiments in my design however you will notice I've left an area rather blank. This is so I can add an extra sentiment at a later date for when I find a need for this card! Do you ever leave cards without a main sentiment on in your stash so you can add one later? This is a great way to build up your stash without knowing what you might need it for! We're going to do a little creative masking today using Memo Tape . This is a low tack  tape that you can use and remove from projects easily without tearing your paper or card stock. You can use anything with a straight edge like printer paper to get the same affect as me today, anything that can be adhered temporarily, removed and moved around will work! Firstly I took a  stitched rectangle panel from  bright white card stock and stamped the 3  words  a little randomly

Happy St. Patrick's Day - Easy Slider cards

Image
Hey Crafty Friends, I'm sharing more inspiration today from a technique I learnt at the recent  Card Maker Success Summit This time my inspiration is from the class by Amy Ulen . I love making pull tab cards in general however had never seen this method before, its so easy and doesn't require any speciality dies. I won't be going into a full step by step today as I'd love you to check out the original source along with a ton of other inspiration all in one place! See below a supply list of products used today and colour combinations for your copics! Plus more photos!  Copic colour combos: G17, G14, G12, YG09, YG06, YG03 C9, C7, C5, C3 Y17, Y15, Y13 YR24, YR23, YR20 Supply list:  Crafty Purple Frog Store:  Starry Rainbow die by Heffy Doodle Scrapbook.com Store:  Starry Rainbow die by Heffy Doodle Crafty Purple Frog Store:  Cloudy Skies stencil by Heffy Doodle Scrapbook.com Store:  Cloudy skies stencil by Heffy Doodle Crafty Purple Frog Store:  Mowed Lawn Distress Ink Sc

You bring colour to my world!

Image
Hey Crafty Friends, Today I'm sharing another project I made during the Card Maker Success Summit , this time inspired by  Justine Hovey  class on shaker cards. The  Heart Pencil Die  from Heffy Doodle is so fun to work with. The possibilities of colour combinations are endless and the letter dies include a 'u' so you can chose European spelling or not! Before you get die cutting it's useful to have some empty trays/pots on hand to put the elements in one place. You can chose die cut this in 2 ways. It's one solid die so you can cut the whole thing from one coloured card stock and repeat this way, the tray/pot will help you keep the spare pieces for a future project. Today I decided to use up some scraps so I chose some smaller pieces of card stock and just placed the die with the size I wanted to cut more a single pencil at a time. This is also a good way use up scrap pieces of card you might have in your stash! My preferred card stock I use is Heffy Doodle which I

Lets go fly a kite!

Image
Hey Crafty Friends, Today I'm sharing a clean and simple card design using an older release from Scrappy Boy Stamps . This release  had me hooked on Scrappy Boy immediately and they haven't disappointed since either!  These cards were made with care homes in mind. I send my cards as part of  Postcards of Kindess programme and needed some extras for my stash that were a quick and easy design but also fun. I started with 2 stitched rectangles for my panels and took some  memo tape to create a masked off area. On the right I stamped the kites in  Tuxedo Black ink, stamp some of them off the page and over the mask so you have a variety. Stamp 2 on a separate piece of card stock, I'm using  alcohol marker friendly card so I can colour them in my copics. Stamp the girl and boy image on  alcohol marker friendly card stock too. Colour combination: Girl card: BG15, BG13, BG11 Boy card: B26, B24, B23, B21 For the rest of my card I took the Heffy Doodle  Zig-a-Zig Ah Chevron  d