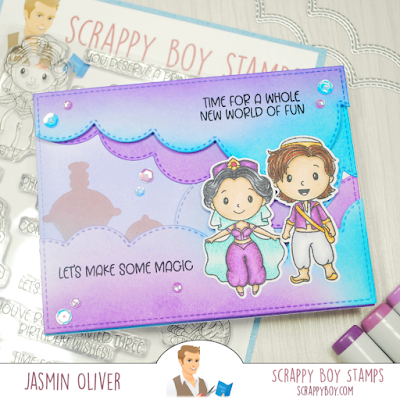
Time for a whole new world of fun
Hey Crafty Friends,
I am super super excited to share this card with you today. If I was to be asked what my dream stamp set would be then this would be in the top 3 for sure!! I mean the hint is my name clearly (minus the e!) 😉 This is the Scrappy Boy Stamps Arabian Nights release, you don't want to miss it!
Card Recipe:
1. Take a panel die cut from your favourite ink blending card stock. I'm using PaintON today. I've die cut using a stitched rectangle one panel and then cut 2 more panels from the same card stock which will create my clouds. Try and leave an area on the left hand side so we can create the illusion later that they are high up in the clouds
2. Die cut your clouds using a stitched cloud die. I've lined them firstly from the bottom up and staggered them to about half way up my main panel and then repeated this from top down so they overlapped
3. Ink blend you cloud panels with Shaded Lilac, Wilted Violet and Mermaid Lagoon distress inks
4. In your area that was left blank use Shaded Lilac to cover the base of the area that was left exposed. I used a pencil to create small dotted areas of where my clouds ended so that I only covered that area, there is no need to ink up your whole base panel then!
5. Use a Skyline stencil with Seedless Preserves, I actually just used what was left on this particular brush without reinking hence the slightly lighter colour. This is a good way to use up colours on your brushes or sponges that hold a lot of ink when you only need a small amount!
6. Stamp the images on alcohol marker friendly card stock and colour in your favourite medium. I'm using copics
Colour combination:
Princess: Hair - C7, C5, C3, C1. Skin: E33, E31, E21, E00. Outfit - V17, V15, V12. Veil - B02, B01, B00
Prince: Skin: E33, E31, E21, E00. Hair - E37, E18, E15, E11. Outfit - V17, V15, V12, C2, C1 for shading in the trousers. Bag + Shoes: YR24, YR23, YR20
7. Stamp desired sentiments onto the top layered clouds using Tuxedo Black Memento Ink
8. Use double sided sticky tape for the first layer of clouds, one at bottom and one at top then use foam tape for your top layers to create some dimension
9. Stick images down with adhesive glue
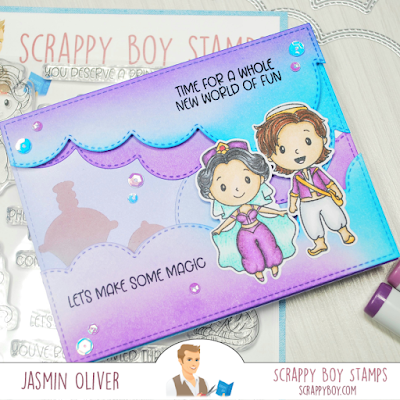
I adore how pretty this card came out and think it will be a while before I will be able to let it go from my stash!
Until next time, happy crafting!
Jas
X
Shopping outside the US? Get all your Scrappy Boy Stamps from Scrapbook Essentials BC
Challenge entries:
Digi Choosday - Anything Goes
Polkadoodles - Anything Goes
Gem of a Craft Challenge - Anything Goes
LeAnns World 101 - Anything Goes
A perfect time to craft - Anything Goes


This just too cute! Love it! Thanks for entering the Digi Choosday Challenge. Good luck!! - Linh (DT)
ReplyDelete