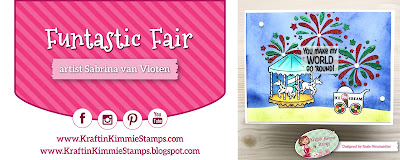
Funtastic Fair - Kraftin Kimmie - June release
Welcome back to Day TWO of our June Krafty Peeks!
Are you excited about what you've seen so far!? Are you ready for more?
I hope your answer was yes because we've got more fabulous fun for you today!
FUNTASTIC FAIR!
Check out FUNTASTIC FAIR! in so many awesome creations today as you hop around the Krafty Team's blogs! You'll also see the new stencils, Add-On bundle and hybrid ink along the way!
Be sure to leave some love at each stop on the hop because there will be a giveaway of some krafty $$ to the shop!
You'll see more of our June goodies all week, and then everything will be released after our LIVE Online Release Party on Saturday afternoon at 2 pm ET in the Krafty Friends facebook group!
*Be sure to join us for our Live Release Party as one lucky Facebook commenter will win Krafty $'s!!
Card Recipe:
1. Take a piece of light pink card stock, using the new fancy fireworks stencil and new krafty ink flirty flamingo to create your background. I love a tone on tone look for more subtle detail
2. Die cut your stencilled panel from a stitched birthday trio die. Keep the die cut pieces in their place so you are keeping the pattern lined up after being die cut
3. Stamp images on alcohol marker card stock and colour in your favourite medium. I'm using copics
4. Die cut the words from your die set or another sentiment if you would prefer from another pink shaded piece of card stock. I have used a scrap metallic look piece of card from my stash. You can pick up brilliant cut off boxes from papermill direct throughout the year that will give you a great range of different card stocks for use in sentiments and card panels!
5. I am turning my card into a shaker card, in order to do this I have cut a piece of acetate down to the same size of my stencilled panel
6. Now as mentioned before you want to keep your pattern lined up so firstly I am going stick the 3 rectangle pieces down onto a main card based. Use a corner edge to help keep your frame lined up to your card base and stick the 3 rectangles down onto the main card panel, this is where they will sit under the acetate and not leave you with just a blank space under the shaker pieces!
7. Take the outer stitched edge frame and attach your acetate using double sided tape or adhesive glue to the back of the frame
8. Now take some foam tape and attach this again on the back of the frame this time just onto the acetate, you can either just go all the way round the edge of the frame and create one big shaker or you can also put foam tape along the middle edging pieces to create individual shaker pockets. This is especially good if you want to uses different shaker pieces in the different sections
Tip: Before putting your shaker pieces onto your card take some anti static powder, same as what you use for heat embossing and rub this over the panels and the acetate, this will help reduce static of the shaker pieces
9. Chose your shaker pieces! I have a variety of fun party type shaker pieces from Lucy's shop. Place the shaker pieces directly onto your rectangle panels on the main card base, you want them central enough that when you put your frame down they won't get stuck under the foam but also spread out enough you don't have too much build up in one place that they might find hard to shift when you put the frame on
10. Keep your card in a corner edge, I like my MISTI with the foam removed for a straight corner, remove the backing tape from your foam tape and place your frame over your shaker pieces attaching it to the main card base.
Make sure it's all stuck down by running your finger around the edges applying a little pressure to bond the foam tape to the card.
Now you can shake!!!
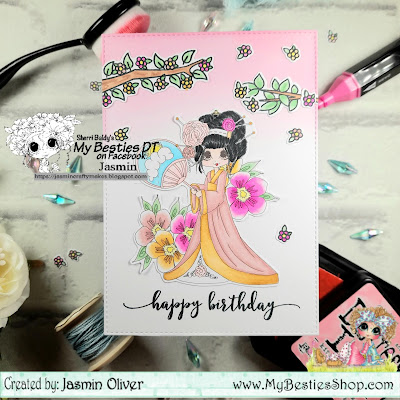
Attach your word sentiments and images and you have yourself a fun shaker birthday card!
I am really enjoying the latest release here at Kraftin Kimmie, you may have noticed today's set matches perfect with yesterday's carnival critters, if you missed it be sure to check out my blog post from yesterday!
Until next time, happy crafting!
Jas
X
https://www.instagram.com/jasmincraftymakes
https://www.pinterest.co.uk/jasmincraftymakes
Challenge Entries:
Simon Says Stamps - Monday challenge - Bright & Cheerful
Simon Says Stamps - Wednesday challenge - Bright & Cheerful
Polkadoodles - Anything Goes


This is such an amazing card!
ReplyDeleteLove your card!!! So fun!!
ReplyDeleteBeautiful shades of pink. Love the design of your card so much. Thank you for choosing to share it with us at Polkadoodles.
ReplyDeleteHope to see you again soon.
Nunzia DT
Adorable! Thank you for joining us for the Polkadoodles Friday Crafting Challenge! Hope to see you again soon! Xoxo, Kim DT
ReplyDelete