Scrappy Boy Stamps - Future Family
Hey Crafty Friends,
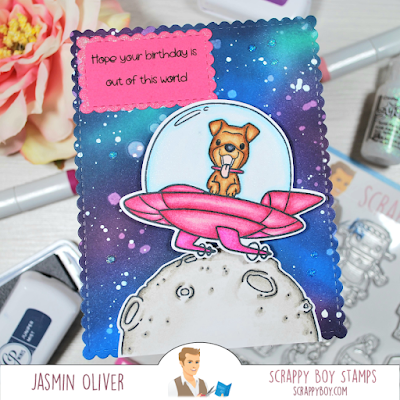
Today I'm sharing my first card made with an older Scrappy Boy Stamps release called Future Family. Whilst this set may be based on something I have never seen.. I know I know the hubby has told me off many times! I am using it to create a galaxy themed birthday card. The dog in this set is so adorable and I just can't resist a dog stamp!
If you have never created a galaxy background before the biggest thing I can say is, it will start off like a hot mess! Don't worry, when you lay up second layers of colour and then the dark blender it comes out amazing!
Card Recipe:
1. Take a piece of bright white card stock, using Catherine Pooler Inks
I've used something borrowed, royal treatment and aquitini, lay your colours down roughly, you don't need to worry about blending the lines here. I am using domed foam blending tools. Once you have your first layer of ink down go over it again with a 2nd layer to create some depth in your colour.
Use a darker ink such as juniper mist to blend it all together, the aim with the darkest colour is to only use it lightly around the edges and to blend in between your colours.
2. Stamp images on alcohol marker friendly card stock and colour in your favourite medium. I'm using copics
Colour Combo:
Dog: E37, E35, E33, E31
Moon: W5, W3, W2, W1
Moon image is from Heffy Doodles You're Weird stamp set
Space Ship: RV19, RV14, RV11
Use B02, B01, B00, B000 for shadow in the glass. I also wanted to add some sparkle, I've used the Spectrum Noir clear sparkle overlay pen. this adds sparkle without ruining your colouring under it.
3. Once your background is dry die cut from a large stitched scalloped frame die


Comments
Post a Comment