Light up card with Scrappy Boy stamps and EZ lights!
Hey Crafty Friends,
Who doesn't love an interactive card? EZ Lights are easy and fun to use in any project. Today I've used them with the latest Scrappy Boy release Curve Appeal. This isn't just a light up card but a light up and shaker card!!

Card Recipe:
1. Take a stitched rectangle rectangle die and cut from a light pink card stock. I'm using bubblegum blush
2. Using the burlesque background stencil and picked raspberry over the top for a 2 tone colour
3. Take a shaped die for the middle, I'm using the die from clover frames
4. Before we move on let's get the middle part of the die cut out stuck down on the main card base, use a corner of a stamping platform or edge to keep your panels straight and just stick down the central middle so you now left with the outer frame with holes and your main card panel for the top
5. Take a piece of clear acetate and stick this behind your main panel that's not yet attached and you can also go ahead and stick the frame with holes on top of the acetate so you've pieced parts of it together again. Try and keep the pattern how it was before you cut (don't look at mine too closely lol!)
6. Now its time to put together the lights, now as usual I totally forgot to take photos at this stage, please visit a previous post here on how to place and stick your lights down, the theory here is no different even though we're also making a shaker card :)
7. Fill you middle with desired shaker pieces, I'm using a selection from Little Things by Lucy.
Tip: add anti static pad to your acetate and card base to assist your sequins to move more freely
8. Attach your front panel to your card base now with foam tape for depth for the shaker

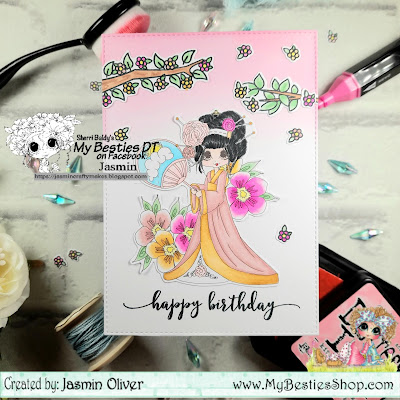
9. Stamp desired image and colour in your favourite medium. I am using copics
Colour Combination
Skin - E33, E11, E02
Outfit - RV19, RV14, RV11
Feathers - RV09, RV06, RV04
Hat - RV19, RV14, RV11, RV09, RV06, RV04
10. Take a stitched strip die and cut from bubblegum blush which is same as your card panel and stamp sentiment in
11. Finish of with extra gems to your liking, I like to use the rule of 'odd' numbers so 3, 5, 7 and so on

If you havn't yet made a light up card they really are not as hard as they look and with the help of Pear Blossom Press products you can't go wrong!
I hope you have enjoyed today's inspiration. I will be back next week to share more inspiration using Scrappy Boy Stamps!
Until then, happy crafting!
Jas
X
P.S Do you have your FREE ticket yet to the card makers success summit, not long to go before all the fun kicks off! Be sure to join us here. Not going to be available during the dates? There is a chance to also upgrade to VIP access to immediate and ongoing access to the summit plus a ton of bonus content. Either way we hope you are able to join us!

Check out my other light up projects below!
Birthday wishes are in the air with Kraftin Kimmie stamps
Masculine light up card with Crafty Purple Frog
Hang in there with Time for Tea Designs
Our friendship is golden with Sweet November Stamps
Some links used today are affiliate links to the stores, you can shop as normal at no extra cost to you. I might earn a small commision on that order which continues to support my crafting habit so I can continue to bring you a variety of content. Thank you for your ongoing support I really appreciate it!


Comments
Post a Comment