Pandamonium - Kraftin Kimmie - April Release
Today is our final day of Krafty Peeks for the April Release
by artist
Becky Pearce called...
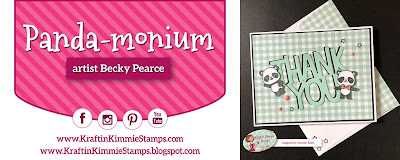
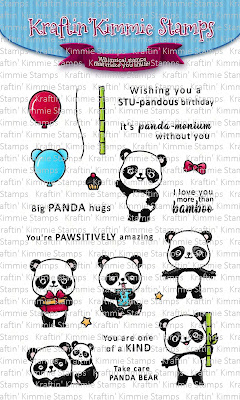
PANDA-MONIUM!
These delightful panda friends are sure to make anyone smile with their cute antics and adorable accessories!
As you hop around the design team's blogs today you'll be able to check out PANDA-MONIUM! in action in combination with a lot of our other new April Kraftin' Kimmie products!
Of course today is also challenge day and as always during release week, it's Anything Goes! So create a card, scrapbook page, altered item, planner page....with some Kraftin' Kimmie Stamps products for your chance to WIN the monthly prize!
We can't wait to see your creations and you have one week to enter! Feel free to link up your creation at the bottom of this post and/or upload your pic to the folder in the Krafty Friends facebook group! You could WIN a gift voucher to the krafty shop!
Check out PANDA-MONIUM! in so many amazing creations today as you hop around the Krafty Team's blogs! You'll also see the new stencils, ANIMAL ADVENTURE! and TINY TRIANGES!, our new LUSCIOUS LEMON hybrid ink and the beautiful APRIL ADD ON BUNDLE along the way!
Card Recipe:
1. Take a slimline die cut panel, I'm using this postage stamp style edged die from the Slimline mini mail dies set and die cut from your favourite ink blending card stock, I'm using Bright White card stock today.
2. Take some green inks, I'm also using my Catherine Pooler inks today. These inks are quite juicy and make it easier for me to cover the card panel a little more quickly on this slimline design today. I start with the lightest green Garden Party, then from the edge inwards use a slightly darker ink Grass Skirt and leave your central highlight of the lighter ink. Take a darker ink lastly Eucalyptus and darken round the edges. Spritz a little water to react the ink to add extra texture and interest to the background.
Tip: if you need to make your blended lines comes together more take the brush of the lightest ink you used and blend them out, you can always repeat the ink layers again for extra depth and this also usually helps with the blended lines!
3. Now we're going to create some apertures on the card front using this die that will create fun lift tabs on my card. This also means I have more space for more images to hide under! I die cut this 3 times down my card.
4. Stamp your images on alcohol marker friendly card stock and colour in your favourite medium. I'm using copics
Colour Combo:
Pandas - C7, C5, C3, C1
Bamboo and Balloons - G17, G14, G12
5. Back your panel with apertures onto a green card base. Mine is cut 8.5x7, scored at 3.5
6. Use an acrylic block to stamp your sentiment under the top flap and another sentiment under the bottom one
7. Attach the rest of your images with adhesive glue, don't forget to hide one under that middle flap!
I hope you have enjoyed today's inspiration, don't forget to comment for your chance to win some Krafty $$ and be sure to check back tomorrow for more inspiration and fun!
Challenge entries:


Love the mint/ spring green colours! Goes well with the bamboo! The sentiment flaps are a great idea!
ReplyDeletepandas are so sweet. We seen them when Toronto Zoo had them visiting. Such sweet things!!!
ReplyDeleteWonderful card! I love that green background.
ReplyDeleteThis is amazing! You always come up with the most creative ideas, and today's card is no exception. I also really appreciate your detailed instructions :)
ReplyDelete